





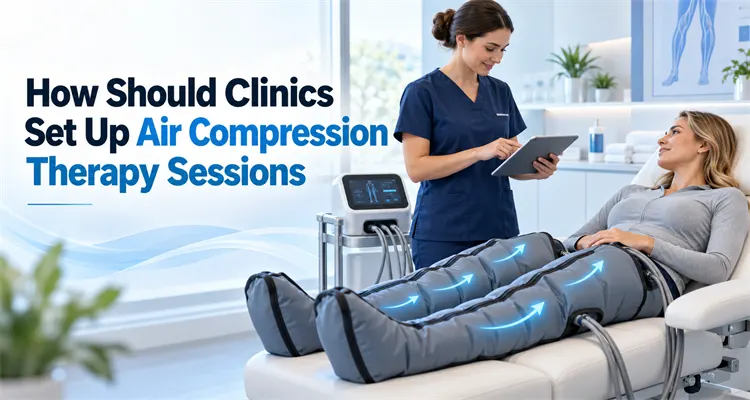
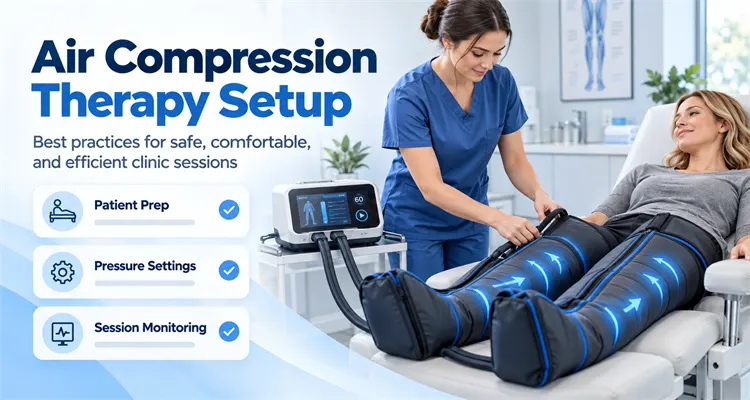
A successful and effective air compression treatment process starts prior to turning on the compression pump. It includes confirming the scheduled appointment, examining the equipment and garments to be used, selecting the proper size of sleeves, positioning the patient for comfort, connecting all hose lines to allow for unimpeded flow, and setting up the machine based upon the physician’s prescription or approval. Observation, cleaning, and record-keeping complete the sequence to ensure that the equipment is prepared for the following treatment.
Consistency is important because a minor error in setup may lead to issues with comfort, chamber inflation, session time, or staff transitions. Having a written procedure provides all team members with identical check points and allows each team member to set up their own equipment and devices.
Build the Workflow Around Five Repeatable Stages
A clinic can organize each session into preparation, fitting, connection and setup, active observation, and post-session reset. The table below functions as a shift handover map rather than a product specification list.
| Workflow Stage | Primary Action | Record or Handover Point |
|---|---|---|
| 1. Preparation | Confirm the session plan and inspect equipment | User status, device identity, garment availability |
| 2. Fitting | Select size and apply the garment smoothly | Garment type, side, size, skin or comfort observations |
| 3. Setup | Connect hoses and enter approved settings | Pressure, mode, cycle or session time |
| 4. Observation | Check comfort, inflation pattern, tubing, and display | Interruptions, adjustments, alarms, response |
| 5. Reset | Stop, release pressure, remove, clean, inspect, and store | Cleaning status, damage, service or supply action |
| Shift review | Confirm the system is complete and ready | Open faults, quarantined items, accessories to replace |
Stage One: Complete the Pre-Session Check
The current treatment plan for the patient in question should be reviewed first. Ensure you have confirmed the part of the body being treated; what type of garment will be worn; whether this is a single side or both sides (bilateral) setup; how long each treatment session lasts; what level of pressure/program can be used during treatment; and if there are specific areas where you should pay close attention. If the patient has experienced changes in their physical state, such as their ability to tolerate treatment, swelling, skin appearance, movement capabilities, or communication skills, then the change must go through the clinic’s assessment process prior to resuming treatment.
Inspect the Control Unit and Accessories
- Match the control unit, power supply, tubing set, and garments to the intended configuration.
- Check the power cord, plug, housing, display, buttons, and connector ports for visible damage.
- Confirm that air inlets and any user-serviceable filter are clear according to the manual.
- Inspect hoses for kinks, splits, discolouration, loose ends, or damaged connectors.
- Check every garment chamber, seam, closure, liner, label, and connector.
- Verify that cleaned items are dry and that any required accessories are present.
Do not mix visually similar hoses or garments unless the manufacturer identifies them as compatible. Connector fit alone does not confirm that the channel order, pressure range, or control program is correct.
Prepare the User and Treatment Position
Provide an explanation of the sequence of events using everyday language and come to an agreement with the user regarding when they will let you know about their discomfort, or if they wish to pause the process. Position the limb or body part being treated in such a way that the garment lies flat, the tube is accessible, and the user can remain in a position that supports them during the entire treatment. The clothing worn beneath the treatment garment should be placed in accordance with the garment’s instructions, and it should remain smooth, not bunched up into areas that create pressure points.
Stage Two: Select and Fit the Sleeve
The amount of space available in a sleeve will determine the user’s level of comfort, and how well the sleeve performs pneumatically. If the sleeve is too small it can cause the user to experience discomfort when they first try on the garment. On the other hand, if the sleeve is too large it can create wrinkles, movement of the sleeve, and/or increased air volume required to inflate the sleeve. You should always use the size chart specifically designed for the type of garment you are purchasing. Do not use measurements taken from a different style of garment to find your correct size.
Measure Before Choosing a Size
Measure the specific body parts (e.g., ankle, calf, thigh, arm, etc.) as indicated by the manufacturer, along with any relevant limb lengths. Use these measurements to determine the size for the person wearing the clothing item, both at the time they receive it and periodically if there are changes in their body shape/size. When a measurement falls on a sizing boundary, refer to the manufacturer’s instructions and test fit with an experienced professional.
Apply the Garment Without Twists or Gaps
- Open the garment fully and identify its orientation, side marking, and chamber direction.
- Place the limb centrally so seams, zippers, or closures align as designed.
- Smooth clothing and garment material from the distal end toward the proximal end.
- Close straps, hook-and-loop panels, or zippers evenly without forcing the closure.
- Check that tubing exits in the intended direction and will not sit beneath the user.
- Confirm that the garment remains secure but does not restrict comfort before inflation.
Practical Tip: Place the size chart near the fitting area, and mark each cleaned garment with its type and size. Staff members should be able to tell what kind of sleeve a garment has without relying on just its color or appearance.
Stage Three: Connect the System and Enter the Settings
Route and Connect the Hoses
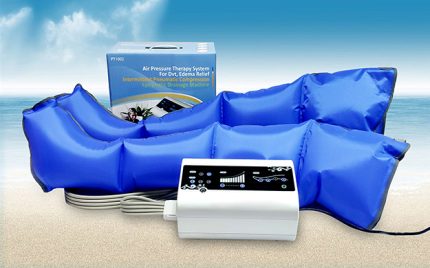
Position the control unit on a flat, sturdy surface and make sure there are no obstructions to the ventilation openings. Position the tubing so that it will not become caught between a chair, treatment table, bed rail, footrest, or other piece of equipment that may move. Connect each connector into the correct port until the connector is fully inserted (as per the instructions provided in the owner’s manual) and verify that the tubing is neither pulled tight nor has any sharp bends.
For multi-channel systems, make sure to use the channels in the same order as they are labeled. Swapping the channels will cause either one of the chambers to inflate before the other, or may prevent the system from operating properly. If the connector has a key, do not force it into place.
Set Pressure, Mode, and Time
The control unit is turned on. The desired pressure, compression type, cycle selection, and session duration for this specific model are chosen. There are some models with one predetermined pressure setting, while others have settings based on chambers, preset gradients, intensity levels, or multiple sequence modes. Only those additional options which are a portion of the selected program and documented for the particular device can be utilized.
- Read back the displayed pressure or intensity before starting.
- Confirm whether the timer represents total session time or a cycle parameter.
- Check that the selected garment or channel mode matches the connected sleeve set.
- Identify the normal stop control and any rapid pressure-release method described in the manual.
- Note whether the device resumes, resets, or retains settings after a pause or power interruption.
Stage Four: Observe the First Cycle and the Ongoing Session
The first time the user inflates, you need to be there. Rather than watching the screen alone, watch the garment. When you see the chambers activate in the order they were programmed, check that all of the closures are closed and that the tubes are clear. Ask the user what it feels like to have the air pressure applied, and make sure that he/she knows how to ask for a pause if needed.
First-Cycle Checks
- The expected chamber begins filling and subsequent chambers follow the selected sequence.
- The garment remains aligned without rolling, twisting, or opening.
- The hose and connector remain stable when the garment expands.
- The control unit reaches its operating state without repeated error or alarm indications.
- The user reports tolerable, even compression rather than pinching, numbness, or localised discomfort.
During-Session Monitoring
Frequency of observation needs to be in line with the clinic’s plan, the user’s ability to communicate, and the manufacturer’s directions regarding the use of the equipment. Check again for proper posture, position of garments, routing of hoses, status of displays and comfort of the user after every movement or change in settings. Users who cannot contact someone to assist them should not be left unattended at the clinic unless the level of observation required by the clinic has been met.
If the user experiences an unexpected pain, marked discomfort, numbness, breathing difficulties, changes in their skin, distress, or other concerning responses, stop the session and begin the clinic’s response pathway. If a garment comes undone, a tube becomes disconnected, a chamber does not fill properly, fluid comes into contact with electrical parts, or the control unit indicates a problem that cannot be resolved using the user manual then stop the session.
Respond to Alarms in a Fixed Order
- Pause or stop the system and check the user first.
- Read the displayed alarm or indicator and keep the device state visible where possible.
- Inspect garment closure, tubing, connectors, and obvious air leaks.
- Apply only the operator checks described in the manual.
- If the fault continues, remove the device from use, label its status, and route it for technical review.
Stage Five: End the Session and Reset the Equipment
Release Pressure Before Removing the Garment
Terminate the procedure using the standard stopping control and let the garment deflate. Use any manual deflation method provided by the equipment according to its operating instructions. To disconnect the tubing, hold the connection instead of pulling on the tubing, and gently open the garment while supporting the extremity as necessary.
Complete the Post-Session Check
Check the user’s comfort level and the area of treatment as per your clinic plan; then compare any of your observations prior to beginning the session with those made during the session. If you experience an interrupted session, changes in treatment settings, fitting problems, or equipment issues, be sure to document them as soon as possible so they will be fresh in your memory.
Clean, Dry, Inspect, and Store
Follow the control-unit and garment instructions for approved cleaning agents, contact time, wipe method, and drying. Keep liquid away from electrical openings and do not immerse components unless the exact item is designed for that process. Clean reusable hoses and connectors where specified, paying attention to surfaces handled during setup and removal.
- Allow every cleaned item to dry fully before packing or reuse.
- Inspect seams, chambers, closures, labels, tubes, and connectors during cleaning.
- Store garments flat or loosely rolled if required, without sharp folds over air channels.
- Coil tubing without tight bends and keep connectors protected from impact.
- Return the pump, power supply, tubing, and garment set to a defined ready location.
- Separate damaged, wet, or incompletely cleaned items from ready equipment.
A clear product page for air compression therapy systems should identify compatible sleeves, tubing, power accessories, cleaning information, and replacement items so the clinic can maintain complete working sets.
Use a Short Record That Supports the Next Session
Documentation should be brief enough to complete reliably and detailed enough to explain what happened. The clinic can align fields with its own system, but each entry should identify the user or case, date and time, device or asset number, garment type and size, body area, selected program, session duration, observed response, interruptions, and operator.
Separate Session Notes from Equipment Records
The session record follows the user’s care or rehabilitation workflow. The equipment record follows the asset: cleaning status, inspection result, alarm history, damage, repair, preventive maintenance, and return to service. Keeping both records linked but distinct makes it easier to see whether an event relates to the user, the setup, or the device.
Close the Loop at Shift Handover
Before Handover, Identify Equipment that is ready for use, in process of cleaning, waiting for accessory parts, or has been removed from service. Fault Notes must contain; Device Identification, Connected Garment, Mode Selected, Visible Indication, operator completed checks, and Current Storage Location. This will prevent the next shift from having to repeat a failed setup or from placing a failed device back into service.
Daily and Periodic Workflow Checks
Not every task belongs after every session. Dividing responsibilities by frequency helps the clinic keep the workflow practical.
- Before each session: inspect the complete setup, confirm fit, settings, tubing, and readiness.
- After each session: stop, remove, clean, dry, inspect, document, and restore the set.
- Each shift or day: review open faults, ready stock, cleaned garments, and missing accessories.
- At scheduled intervals: complete filter, electrical, calibration, battery, or preventive maintenance tasks specified for the model.
- After repair or component replacement: verify function with the correct garment before returning the system to service.
Frequently Asked Questions
Can One Sleeve Size Be Used for Every Patient
No. The clinic should use the measurement points and size chart for each specific garment. Usually, a clinic will need to establish a planned size range and have a method to distinguish clean garments from un-cleaned garments.
Should Pressure Be Selected Only by Body Weight
The program you choose to run must align with your clinic’s protocols for the device being used, along with its specific operating procedures. You must also consider the fit of the compression garment you are utilizing, where on the patient’s body you will be treating, the level of comfort of the patient during treatment, how the patient responds to the treatment, and what you hope to achieve with the treatment. Your decision to set the device at a certain level based solely upon the patient’s weight is incorrect.
When Should the First Fit Be Rechecked
Recheck during the first inflation cycle, after repositioning, after a setting change, and whenever the user reports a change in comfort. Repeat measurement when body dimensions or swelling may have changed.
Can a Garment Be Reconnected While Still Inflated
Use the stop and pressure-release sequence stated for the device. Reconnecting under pressure can make connector handling difficult and may not restore the intended chamber order.
What Should Be Recorded After an Alarm
Record the device and garment identity, displayed indication, point in the cycle, user response, operator checks, whether the session resumed, and where the equipment was placed afterward.
Conclusion
Clinic workflow is completely connected by the preparation of equipment, proper fitting of equipment on the patient, setting adjustments, observing the patient while using the equipment, cleaning the equipment after use, and documenting all data collected. The stages are dependent upon each other as they provide protection to the next stage. Proper sizing will result in a predictable amount of pressure being applied to the patient. Proper routing of the hoses will allow for the correct order of chambers to inflate. Observation of the first cycle can identify problems that may have occurred during the initial setup of the equipment. Documenting after each treatment session can prevent unresolved issues from affecting the next appointment.
The most useful procedure is one that staff can repeat without guessing. Keep model instructions accessible, organize garments and accessories clearly, use the same stop-and-check order for abnormalities, and finish every session with a confirmed equipment status.